Back to Back orders in OM
Back to back order
Customer places order to you, you place the order to your supplier. Your supplier ships the goods to you and in turn you ship the goods to customer.
You can use the scenario when
· You do not have stock or inventory
· You do not manufacture
Cycle-
Create a Sales Order with line where the line source is Internal
Book the order status will be supply eligible, progress the order status will be external req requested
In purchasing run the requisition import with import source as CTO
Auto create PO, approve PO. Order line status will be PO open
Receive against the PO order status will be awaiting shipping.
Then pick release and ship the sales order
Drop Shipment is a process where the customer places a purchase order on a company and the company instructs its supplier to directly ship the items to the customer.
Drop Shipment Process Steps
Create a Sales Order with line where the line source is External
Book and Schedule the Sales Order
Run workflow background Process
Now the line status will be in Awaiting Receipt
Login to the Receiving Organization (Purchasing) who has been setup as an Approver
Run Requisition Import Process
Auto create to Create Purchase Order
Approve the PO
Receive against the purchase Order
Run Auto Invoice
Verify Invoice in Sales Order
Oracle Order Management uses purchase orders to outside suppliers that are automatically generated from sales orders for goods supplied directly from the supplier. The external supplier ships the goods directly to the 3rd Party customer and confirms the shipment through the use of an Advanced Shipment Notice (ASN).
What are the different statuses for a drop ship order?
Entered àBooked àAwaiting Receipt à Closed
Back to back order Vs Drop Ship in OM
Difference between drop shipment and back to back order
In B2B the source will be internal but the item would be procured after the order is created
In Drop Ship the source will be external
In Drop Ship orders, material is directly shipped to the customer from the supplier. Thus, inventory is not affected. In this case, only logical receiving is done. But in the case of Back-to-Back orders, material is taken from inventory.

Back to Back order Flow
Step#1 Item attributes
Inventory super user- master items
In the Order Management tab, check the Assemble to Order flag (ATO).
In the Purchasing tab, enter a value in the List Price field.
In the Work in Process tab, make sure the Build in WIP flag is checked.
In the General Planning tab, set the Make or Buy flag to Buy.
Save, and assign to Organization M1.
In the Purchasing tab, enter a value in the List Price field.
In the Work in Process tab, make sure the Build in WIP flag is checked.
In the General Planning tab, set the Make or Buy flag to Buy.
Save, and assign to Organization M1.


The responsibility to be used is Order Management Super User, Vision Operations (USA)


Book the Order; note the order line status as ‘Supply eligible’ immediately after booking the order.

Progress the order line- right click on the line and select progress order. And then select activity as “create supply order- eligible”

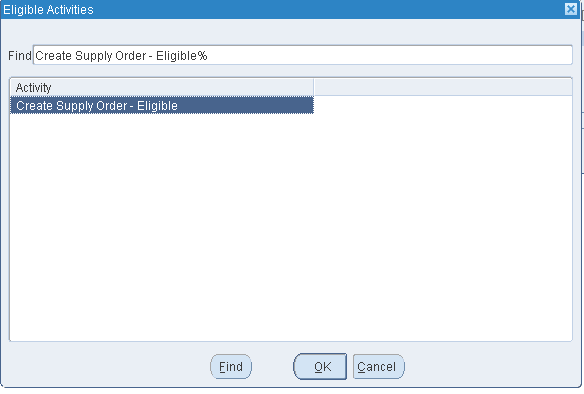
Once clicked ok note the line status as “External Req Requested”

From backend you can see the requisition is created into requisition interface for the order line id as 407416
select * from po_requisitions_interface_all
where interface_source_code = 'CTO'
and trunc(sysdate) = trunc(creation_date);
where interface_source_code = 'CTO'
and trunc(sysdate) = trunc(creation_date);

Step#3 Requisition import
Responsibility- Order Management Super User, Vision Operations (USA)
Orders, Returns menu - choose 'Requisition Import'
- Import Source will be CTO and Initiating Approval is not required as the record was inserted into the po_requisitions_interface_all table having a status of 'Approved'. The status will always be Approved.
- Submit the Request and then close the Requests Form
- Submit the Request and then close the Requests Form

Step#4 Auto create the PO
Navigate to Purchasing/Requisitions Summary Find the requisition by item number


Auto create the PO based on the requisition above. Click on auto create and enter requisition number
Navigate Purchasing/Autocreate

Select the line and click automatic


A Supplier should default, click the Create Button. If a Supplier and Site did not default, choose any Supplier - Allied Manufacturing/LOS ANGELES for example.
A Purchase Order is then created.

Once the PO is approved you can see the order status as “PO OPEN”

Step#5- Create the receipt
Navigate to Purchasing/Receiving/Receipts and select M1 as the inventory organization - as this was the inventory organization used on the Purchase Order Shipment

Select the line enter the subinventory and locator (if needed) and save the record.

View the receiving transactions of the receipt done above
Navigate to Purchasing/Receiving/Receiving Transactions Summary and then enter the Receipt Number or PO number and Choose Find

Once received come back on the order and note the line status as awaiting shipping.

You can then ship the order from here.

This explains back to back order flow in Oracle R12
Thanks,
Ajay


